Why should we know about the parts and components of 3D Printers?
Hopefully, most people already know this, but using a 3D printer isn’t as simple as just a press of a button. While it is true that pressing a button is involved when printing, only knowing how to do that would get you nowhere.
Buying a 3D printer is like buying a new car. Once you get the keys, everything seems fine, you have a brand-new car that you can drive around anywhere, with just a turn of a key or a push of a button. Everything changes when the car starts to break down. Now you have to visit an auto repair shop and waste your entire salary fixing your car, only for it to break down again…
While this comparison is slightly exaggerated, every hobbyist and expert knows that 3D printers have problems all the time. Knowing how to solve and prevent these problems can save lots of time, money, and anger, and it all starts with understanding the anatomy of a 3D printer. Understanding how each part and component plays their own separate roles while working together with other components to construct this complex machine will be essential to solving future problems and issues that occur.
Print Bed

Purpose
The print bed is a flat area that serves as the printer’s “workspace” when extruding filament. Most printers include a build surface cover placed on top of the printer’s bed, sometimes called a “build plate”. This area provides a surface in which extruded filament can be shaped into a physical object. These build surfaces have adhesive properties so that filament can stick to it and so that it doesn’t move while printing. To do this, some build plates use magnetism to create a more adhesive surface.
Movement
Most print beds only move in one direction during the printing process, the y-axis, while other components of the printer are responsible for movement in the remaining directions. The movement of the bed is possible using linear guide rails placed under the bed, sliding it back and forth in one direction. The type of design to produce this movement is known as a “bed slinger mechanism”. While it is very uncommon, some printers use a fixed bed mechanism instead. This means the bed is fixed in place and can’t move while other components of the printer allow movement of all three axes.
Materials
There are a variety of materials that could be used to make a printer’s build plate, these materials depend on the printer’s model and the type of filament used. The most commonly used materials in build plates are flexible and unflexible steel plates, glass, smooth and textured PEI, and more. While these materials have differences in adhesiveness, the type of build plate you choose will also change the texture and the quality of the final print.
Extruder System

Purpose
The purpose of the extruder system is to drive, heat, and extrude filament onto the print bed. Filament is needed for all extrusion-based 3D printers, as it’s the primary material in a printed model. The extrusion system allows strands of filaments to shape into a model on the print bed.
Movement
The extruder head is part of a printer’s extruder system, containing many other parts that are essential in the extrusion process. Like the print bed, a printer’s extruder head uses metal linear rails to allow it to move in two dimensions, along the x-axis and along the z-axis. The movement of the extruder head along these rails is often powered by stepper motors.
Along with the movement of the extruder head, the extruder system also controls the movement of filament. The filament is inserted into the extruder head using an extrusion drive, a system of gears that drive filament into the extruder. The filament then enters the hotend where it is heated at a temperature that allows it to soften. This softening of the filament strand allows the filament to have more freedom of movement, making it easier to shape a model. Once heated to the correct temperature, the soft filament is released onto the print bed through the nozzle, a small metal opening at the bottom of an extruder head.
Materials
The materials used in the extruder system depend on the purpose of each separate part. The purpose of hotends is to melt filament to a certain point, meaning they’re always exposed to excessive amounts of heat. For this reason, a hotend of a 3D printer is most commonly made of stainless steel or titanium, metals that are strong enough to withstand intense heat.
Nozzles, unlike hotends, are commonly made of brass. This alloy maintains the high temperatures of filament while also being an affordable material. To ensure the temperature of the filament doesn’t increase too much, cooling fans are included in the extruder system to act against the heat of the hotend, allowing the filament to reach the perfect temperature. Without these cooling fans, filament exiting the hotend would be completely melted, most likely creating problems by clogging the nozzle.
Control System

Purpose
The purpose of the control system of the 3D printer is to control each of the printer’s movements and decisions. This includes controlling the movement of the bed, the extruder head, and the extrusion of filament. This means the control system acts as the “brain” behind the entire machine. There are many different components to the control system, each one having its own role and purpose.
Controller Board
The controller board is the most important part of the control system. Sometimes called the motherboard, it acts as a computing system that controls the actions of the 3D printer. The controller board gets information about a 3D model when code is input into it. From the data the controller board obtains, it outputs a series of commands for the printer. These commands address different parts and areas of a 3D printer, like motors, sensors, and more.
Power Supply Unit (PSU)

For any part of a 3D printer to function, it requires power. The power supply unit, or PSU, provides and controls the amount of power the 3D printer receives. Electrical outlets are used to power 3D printers, however, those outlets provide an excessive amount of power, too much for a 3D printer to handle by itself. The PSU’s job is to take this abundance of electrical power from an electrical outlet and lower the amount of power to either 12 volts or 24 volts, almost 10 times less power. This much power can be easily handled by the 3D printer, unlike the amount of power coming from only an electrical outlet.
Display Screens
The purpose of display screens is to provide a user interface system within the 3D printer. An interface system allows users to control the printer and perform certain actions. This is also how users choose which file to print, the temperature of the bed and hotend, and change different settings based on the user’s preference. Most 3D printer display screens use an LCD display system. An example of this is the display screen used in the Creality Ender 3, which is shown in the image above. More advanced 3D printers, like the Bambu Lab X1-Carbon printer, use more intelligent systems of display. Some companies also allow users to access the display system from an application on their phone or another device.
Printer Frame
Purpose
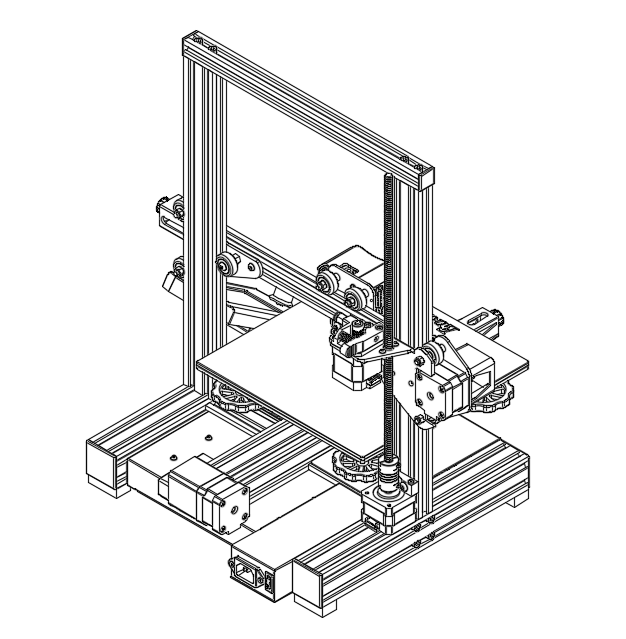
The purpose of a 3D printer’s frame is to provide support and stability to each working component of the 3D printer. Without the overall framework, the print bed, extruder system, and other moving parts of the printer wouldn’t function safely. As well as providing stability and support, the frame also includes parts that allow the movement of the bed and extruder system.
The printer frame is set up using multiple strong linear rails attached together. These linear rails are the same rails that are responsible for providing movement to the printer bed and extruder system.
The linear rails used for the frame of a 3D printer are most often made of hardened steel. This material is very strong and secure, ensuring that the frame of the 3D printer is stable and resistant to bending.
Summary
While many people may assume that using a 3D printer is as simple as pressing a button, this complex machine contains many different parts and components that work together to allow a 3D printer to function. Before buying and using a 3D printer, it is extremely beneficial to understand how this machine functions, as having this knowledge can help solve many problems that occur in the future.
Now that we’ve discussed the anatomy of a 3D printer and the purpose of each part, we’re ready to start brainstorming and creating designs to print. In the next part of this series on the Introducting to 3D Printing, we’ll introduce the use of Computer Aided Design (CAD) Software to create custom 3D models.


