What is Resin 3D Printing?
Resin 3D printing is an additive manufacturing process that uses liquid UV plastic resin to create three-dimensional objects. Unlike traditional FDM (Fused Deposition Modeling) printers that use solid plastic filaments, resin printers work with liquid plastics that harden when exposed to UV light.
In FDM Printers, the filament is melted down and then placed on a print surface or print bed in layers to construct a model layer by layer. Resin printers are similar but also different. With each layer, UV light shines in a particular pattern or shape on the liquid resin. This UV light hardens the liquid resin in the same pattern that it originally shone. This creates the first layer of a resin print. Similarly to filament printers, resin printers build up objects layer by layer on the print surface.
Essential Components of Resin 3D Printing
To understand how resin printing works, it’s crucial first to understand the key components that make this process possible:
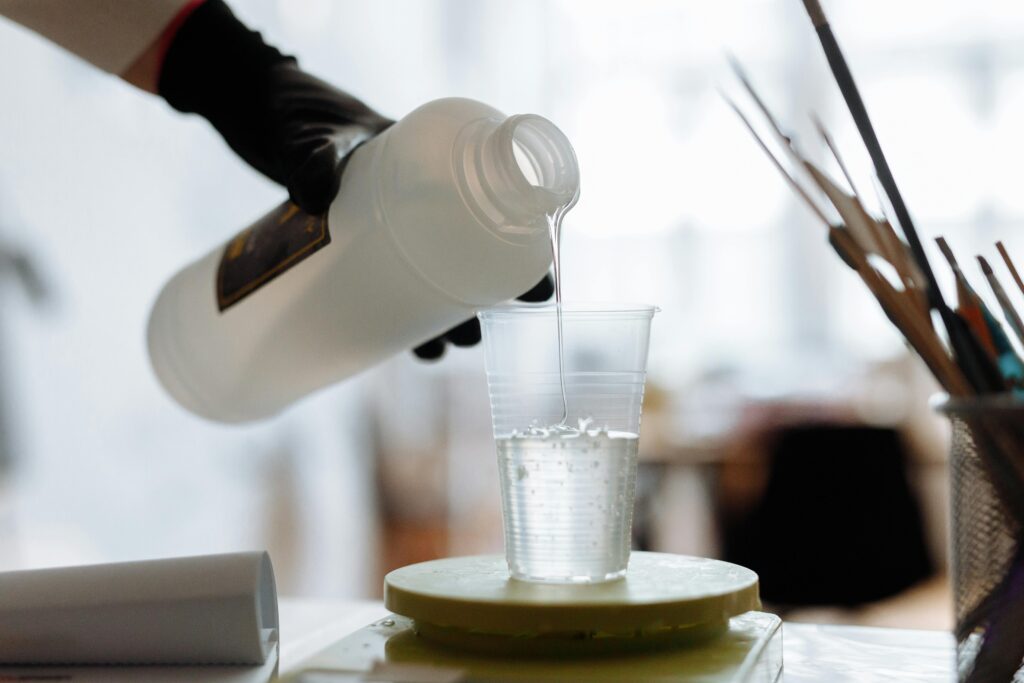
Liquid UV Resin
The most important part is the main material: Liquid UV Resin. This plastic is the building block of every print and comes in various colors, properties, and prices. The impact of this material comes from its ability to transform from liquid to solid when exposed to UV light, a process known as photopolymerization.
Resin Tank (Vat)
In FDM printers or filament-based 3D printers, the filament is stored in a circular spool while printing. In Resin printers, liquid resin is the main material, acting as the “filament” of a resin printer. Liquid Resin is stored in a “vat”, or a small tank within the printer. When printing starts, some resin from the vat will be hardened and used for the model.
A key feature of this tank is its transparent bottom layer, which is made from FEP film. This film acts as a “window”, allowing UV light to pass through while maintaining a surface for the cured resin.
LED Lamp and LCD Screen
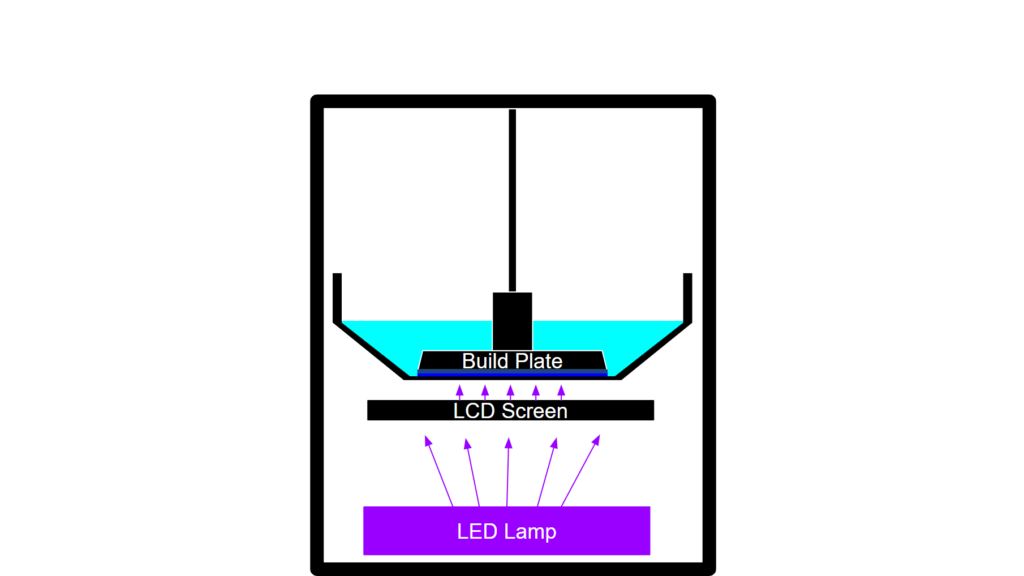
The printing process relies on two key components working together: the UV LED lamp and the LCD screen. A major part of resin printing is light. This is because liquid resin hardens and solidifies when exposed to UV light. The LED lamp provides the UV light source to harden or “cure” the resin.
The LCD screen filters out light from the LED lamp into specific patterns. For each layer, a different pattern is projected on the LCD screen. The UV light from the LED Lamp then shines through this screen in the specific pattern projected by the LCD screen. Therefore, the liquid resin is cured in the different patterns displayed by the LCD screen.
Build Platform
Similarly to FDM 3D printers, the build plate is where the object is printed. However, unlike FDM printers where objects are built up from the platform, resin printers work in reverse. The build platform starts at the bottom and gradually moves upward as each layer is created below it. This is because the build platform must be submerged in the resin vat during the printing process.
Isopropyl Alcohol
Sandpaper is a common tool in FDM printing as a post-processing tool to ensure the print is smooth. Resin prints use isopropyl alcohol for a similar purpose. Objects printed with resin often have some liquid resin residue left over. An isopropyl alcohol solution cleans printed objects of leftover resin, sometimes making them smoother.
The Process of Resin Printing
One of the hardest things for beginners to wrap their heads around is the process of resin printing because of how much it differs from the FDM printing process.
1. Preparation
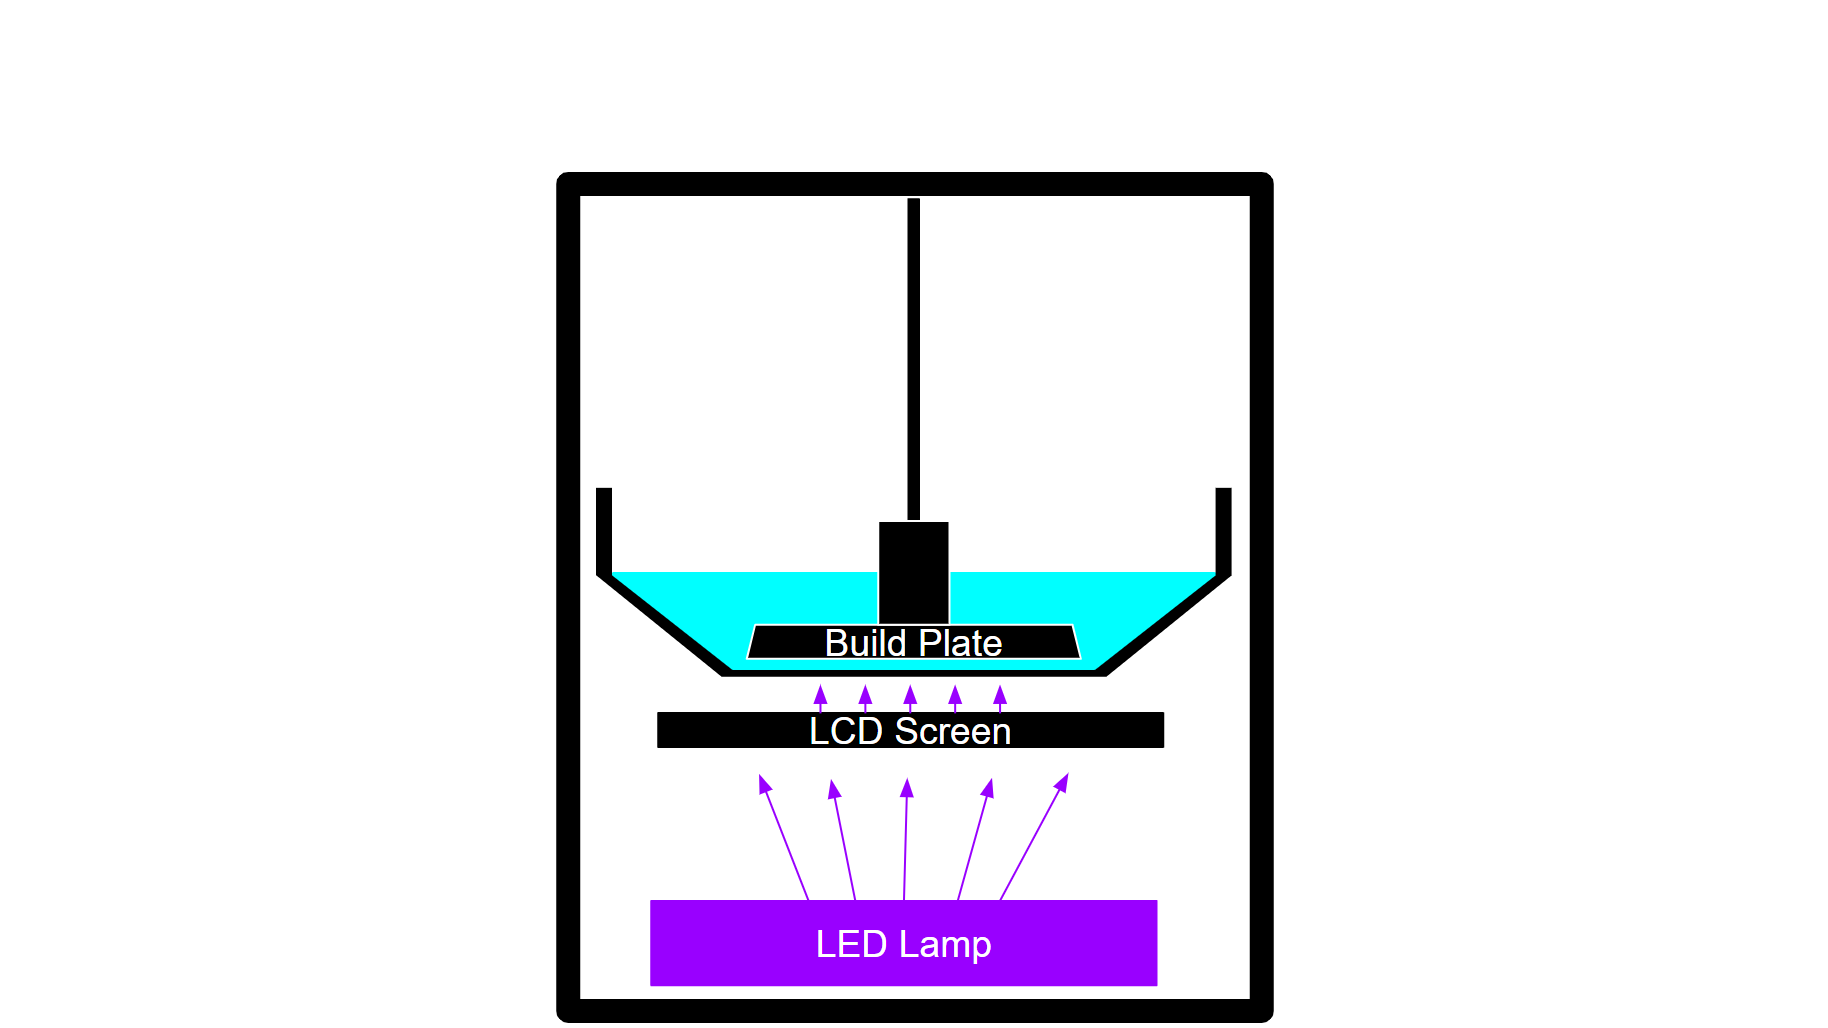
The process begins with filling the resin vat with your chosen liquid resin. Liquid resin comes in many different colors, properties, and prices users can choose from. When the printing process starts, the build plate will lower and submerge itself under the liquid resin in the vat. Instead of submerging itself completely to the bottom of the vat, the build plate leaves a very small space between itself and the FEP film. This small space will be where the first layer is.
2. Layer Creation
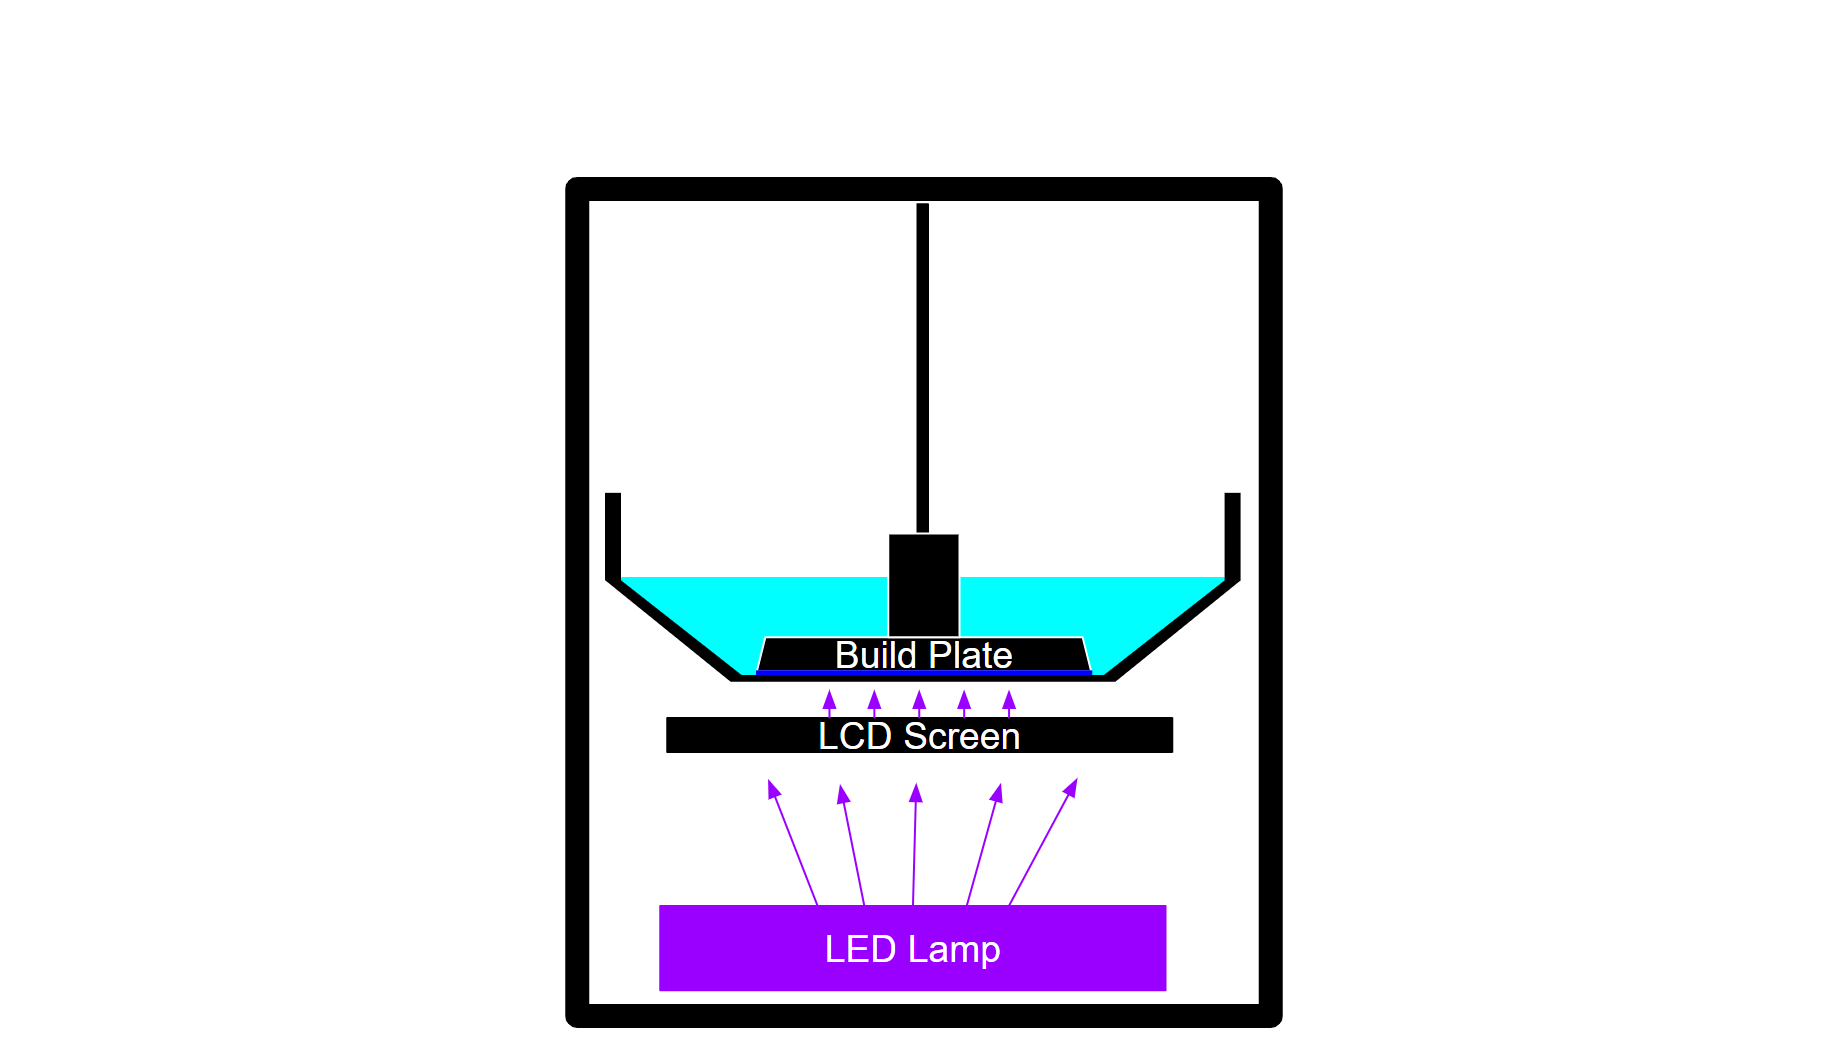
As printing begins, the LCD screen displays a specific pattern – essentially a cross-section of your object. The UV LED lamp then turns on. Once the UV light passes through the LCD screen, it will shine in the pattern displayed by the screen.
This pattern of UV light will then pass through the FEP film and gain contact with the resin in between the build plate and the film. The UV light will “cure” or solidify the liquid resin in the particular pattern that the light is shone in. Once hardened, the first layer is created.
3. Layer Progression
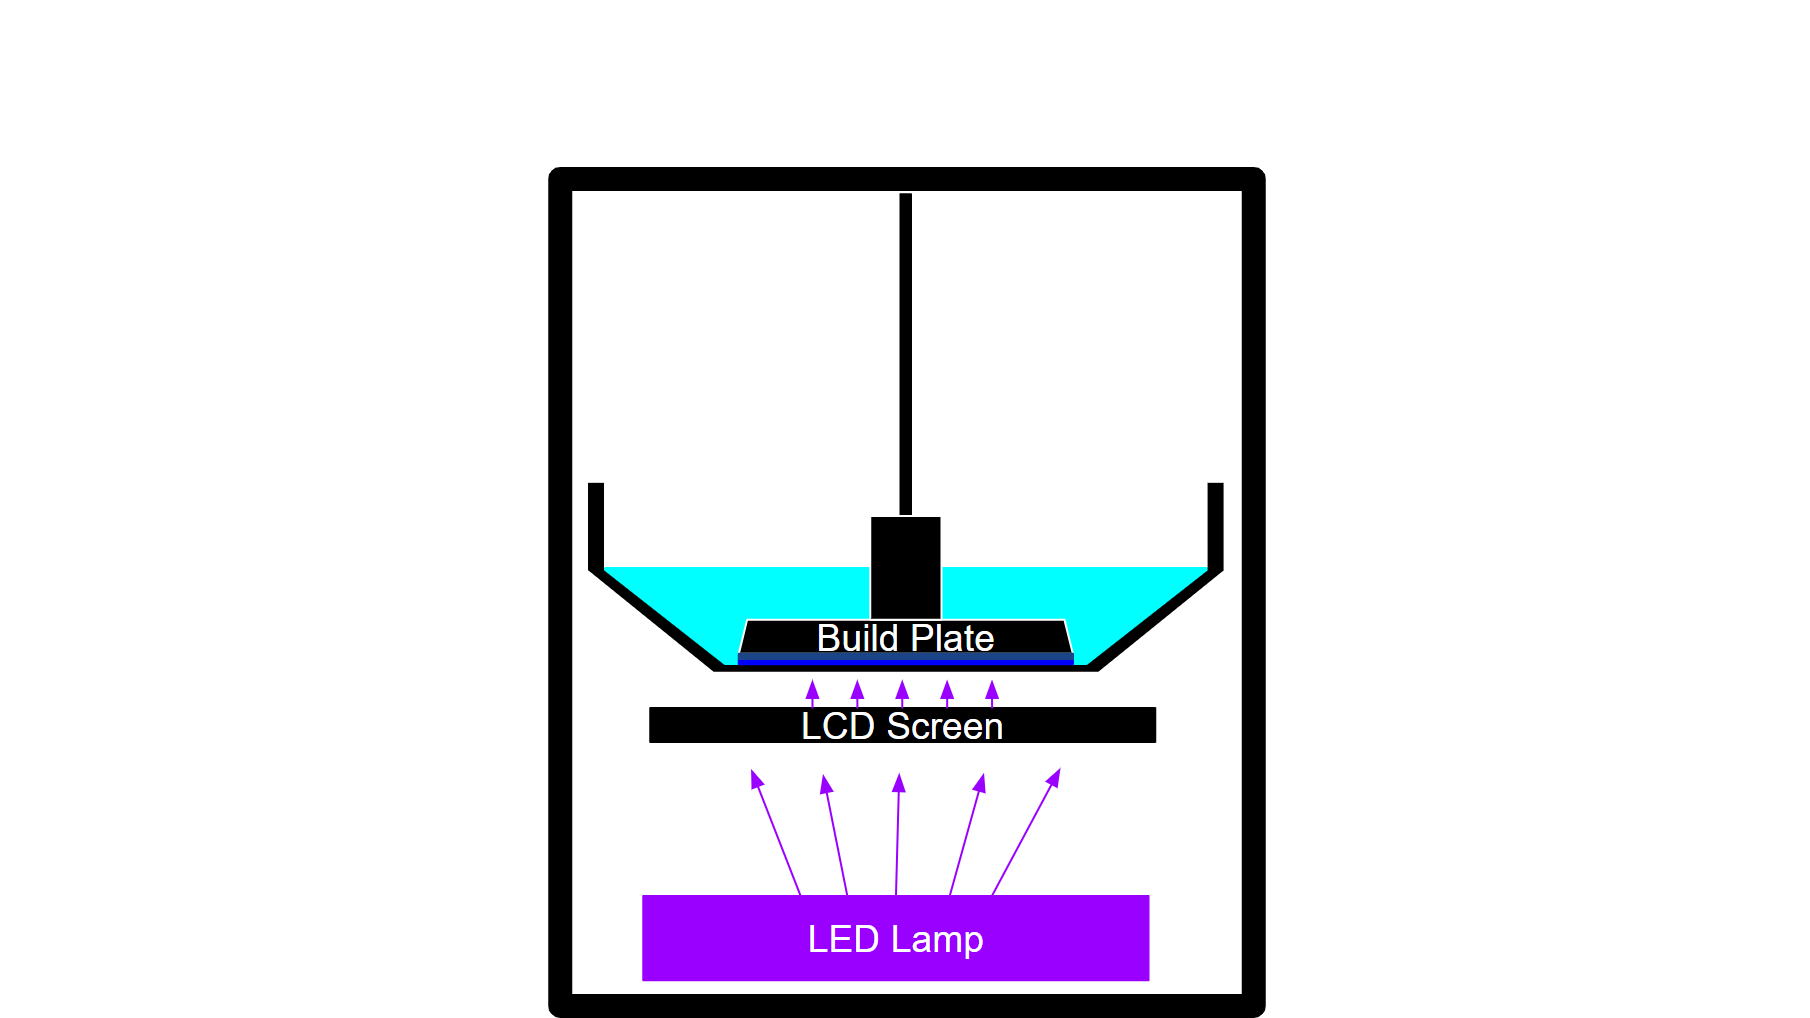
After the first layer is complete, the build platform moves up slightly, allowing fresh liquid resin to flow under the previous layer. The process then repeats, with the LCD screen displaying the next pattern and the UV light curing the next layer. This continues hundreds or even thousands of times, with each layer taking the same amount of time to complete. After all layers are complete, the print is finished and can be taken off the build plate. However, there is still work to be done.
Post-Processing: The Final Steps
Creating a successful resin print doesn’t end when the printer finishes printing. Post-processing is crucial for achieving the best results:
Cleaning
Once printing is complete, the object is carefully removed from the build platform. At this stage, the print is most likely covered in excess liquid resin that must be cleaned off. This is where isopropyl alcohol comes into play, serving as an effective cleaning solution for prints. Resin prints are often submerged in a tub of isopropyl alcohol to remove any uncured resin residue from the print’s surface.
Final Curing
The final step involves post-curing the print in a UV curing station or under UV light. This ensures that all parts of the print are fully cured and solid, achieving their maximum strength.
Conclusion
Resin 3D printing represents a remarkable achievement in the additive manufacturing industry, offering unmatched levels of detail and precision in creating 3D objects. By understanding the science behind this process and how each component works in unison, we can make better use of these machines to create imaginative and innovative prints.
